Saturday, November 11, 2017

Laravel - Security

Security is important feature while designing web applications. It assures the users of the website that their data is secured. Laravel provides various mechanisms to secure website. Some of the features are listed below −
  • Storing Passwords − Laravel provides a class called “Hash” class which provides secure Bcrypt hashing. The password can be hashed in the following way.
$password = Hash::make('secret');
  • make() function will take a value as argument and will return the hashed value. The hashed value can be checked using the check()function in the following way.
Hash::check('secret', $hashedPassword)
The above function will return Boolean value. It will return true if password matched or false otherwise.
  • Authenticating Users − The other main security features in Laravel is authenticating user and perform some action. Laravel has made this task easier and to do this we can use Auth::attempt method in the following way.
if (Auth::attempt(array('email' => $email, 'password' => $password))) {
   return Redirect::intended('home');
}
The Auth::attempt method will take credentials as argument and will verify those credentials against the credentials stored in database and will return true if it is matched or false otherwise.
  • CSRF Protection/Cross-site request forgery (XSS) − Cross-site scripting (XSS) attacks happen when attackers are able to place client-side JavaScript code in a page viewed by other users. To avoid this kind of attack, you should never trust any user-submitted data or escape any dangerous characters. You should favor the double-brace syntax ({{ $value }}) in your Blade templates, and only use the {!! $value !!} syntax, where you're certain the data is safe to display in its raw format.
  • Avoiding SQL injection − SQL injection vulnerability exists when an application inserts arbitrary and unfiltered user input in an SQL query. By default, Laravel will protect you against this type of attack since both the query builder and Eloquent use PHP Data Objects (PDO) class behind the scenes. PDO uses prepared statements, which allows you to safely pass any parameters without having to escape and sanitize them.
  • Cookies – Secure by default − Laravel makes it very easy to create, read, and expire cookies with its Cookie class. In Laravel all cookies are automatically signed and encrypted. This means that if they are tampered with, Laravel will automatically discard them. This also means that you will not be able to read them from the client side using JavaScript.
  • Forcing HTTPS when exchanging sensitive data − HTTPS prevents attackers on the same network to intercept private information such as session variables, and log in as the victim.

Laravel - Facades

Facades provide a "static" interface to classes that are available in the application's service container. Laravel "facades" serve as "static proxies" to underlying classes in the service container, providing the benefit of a terse, expressive syntax while maintaining more testability and flexibility than traditional static methods.

How to create Facade

The following are the steps to create Facade in Laravel.
  • Step 1 − Create PHP Class File.
  • Step 2 − Bind that class to Service Provider.
  • Step 3 − Register that ServiceProvider to Config\app.php as providers.
  • Step 4 − Create Class which is this class extends to lluminate\Support\Facades\Facade.
  • Step 5 − Register point 4 to Config\app.php as aliases.

Facade Class Reference

Laravel ships with many Facades. The following are the in-built Facade class references.
FacadeClassService Container Binding
AppIlluminate\Foundation\Applicationapp
ArtisanIlluminate\Contracts\Console\Kernelartisan
AuthIlluminate\Auth\AuthManagerauth
Auth (Instance)Illuminate\Auth\Guard
BladeIlluminate\View\Compilers\BladeCompilerblade.compiler
BusIlluminate\Contracts\Bus\Dispatcher
CacheIlluminate\Cache\Repositorycache
ConfigIlluminate\Config\Repositoryconfig
CookieIlluminate\Cookie\CookieJarcookie
CryptIlluminate\Encryption\Encrypterencrypter
DBIlluminate\Database\DatabaseManagerdb
DB (Instance)Illuminate\Database\Connection
EventIlluminate\Events\Dispatcherevents
FileIlluminate\Filesystem\Filesystemfiles
GateIlluminate\Contracts\Auth\Access\Gate
HashIlluminate\Contracts\Hashing\Hasherhash
InputIlluminate\Http\Requestrequest
LangIlluminate\Translation\Translatortranslator
LogIlluminate\Log\Writerlog
MailIlluminate\Mail\Mailermailer
PasswordIlluminate\Auth\Passwords\PasswordBrokerauth.password
QueueIlluminate\Queue\QueueManagerqueue
Queue (Instance)Illuminate\Queue\QueueInterface
Queue (Base Class)Illuminate\Queue\Queue
RedirectIlluminate\Routing\Redirectorredirect
RedisIlluminate\Redis\Databaseredis
RequestIlluminate\Http\Requestrequest
ResponseIlluminate\Contracts\Routing\ResponseFactory
RouteIlluminate\Routing\Routerrouter
SchemaIlluminate\Database\Schema\Blueprint
SessionIlluminate\Session\SessionManagersession
Session (Instance)Illuminate\Session\Store
StorageIlluminate\Contracts\Filesystem\Factoryfilesystem
URLIlluminate\Routing\UrlGeneratorurl
ValidatorIlluminate\Validation\Factoryvalidator
Validator (Instance)Illuminate\Validation\Validator
ViewIlluminate\View\Factoryview
View (Instance)Illuminate\View\View

Example

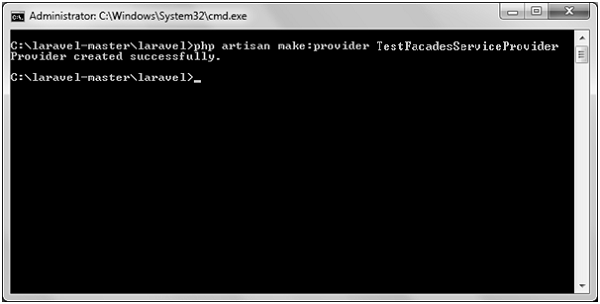
Step 1 − Create a service provider called TestFacadesServiceProvider by executing the following command.
php artisan make:provider TestFacadesServiceProvider
Step 2 − After successful execution, you will receive the following output −
FacadesServiceProvider
Step 3 − Create a class called “TestFacades.php” at “App/Test”.
App/Test/TestFacades.php
<?php
namespace App\Test;

class TestFacades{
   public function testingFacades(){
      echo "Testing the Facades in Laravel.";
   }
}
?>
Step 4 − Create a Facade class called “TestFacades.php” at “App/Test/Facades”.
App/Test/Facades/TestFacades.php
<?php
namespace app\Test\Facades;
use Illuminate\Support\Facades\Facade;

class TestFacades extends Facade{
   protected static function getFacadeAccessor() { return 'test'; }
}
Step 5 − Create a Facade class called “TestFacadesServiceProviders.php”at “App/Test/Facades”.
App/Providers/TestFacadesServiceProviders.php
<?php
namespace App\Providers;
use App;
use Illuminate\Support\ServiceProvider;

class TestFacadesServiceProvider extends ServiceProvider {
   public function boot() {
      //
   }
   public function register() {
      App::bind('test',function() {
         return new \App\Test\TestFacades;
      });
   }
}
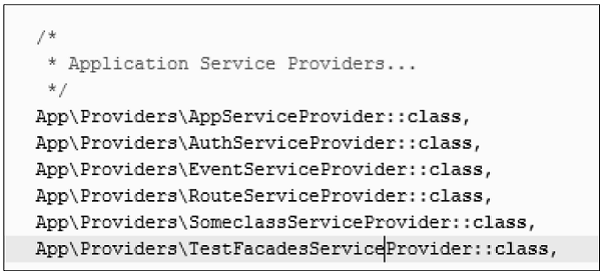
Step 6 − Add a service provider in a file config/app.php as shown in the below figure.
config/app.php
Service Provider
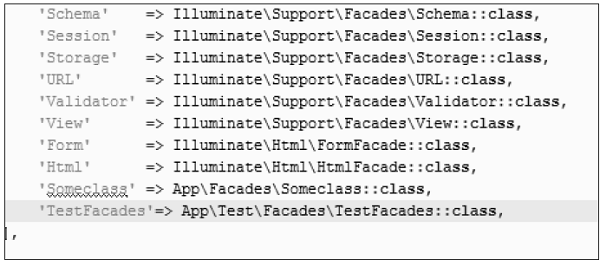
Step 7 − Add an alias in a file config/app.php as shown in the below figure.
config/app.php
Alias
Step 8 − Add the following lines in app/Http/routes.php.
app/Http/routes.php
Route::get('/facadeex', function(){
   return TestFacades::testingFacades();
});
Step 9 − Visit the following URL to test the Facade.
http://localhost:8000/facadeex
Step 10 − After visiting the URL, you will receive the following output −
Testing Facades

Laravel - Event Handling

An event is an action or occurrence recognized by a program that may be handled by the program. Laravel events simply provide an observer implementation. Event can be handled by the following steps −
Step 1 − Create an Event class.
Event class can be created by executing the following command.
php artisan make:event <event-class>
Here the <event-class> should be replaced with the name of the event class. The created class will be stored at app\Events directory.
Step 2 − Create a handler class to handle the created event.
Event handler class can be created by executing the following command.
php artisan handler:event <handler-class> --event = <event-class>
Here the <event-class> should be replaced with the name of the event class that we have created in step-1 and the <handler-class> should be replaced with the name of the handler class. The newly created handler class will be stored at app\Handlers\Events directory.
Step 3 − Register the Event class and its handler in EventServiceProvider class.
We now need to register the event and its handler class in app\Providers\EventServiceProvier.php file. This file contains an array called $listen. In this array we need to add event class as key and event handler class as its value.
Step 4 − Fire the event.
Last step is to fire the event with Event facade. fire() method hsould be called which takes object of the event class. Event can be fired as shown below −
Event::fire(<Event Class Object>);
<Event Class Object> should be replaced with the object of the event class.

Example

Step 1 − Create a controller called CreateStudentController by executing the following command.
php artisan make:controller CreateStudentController --plain
Step 2 − After successful execution, you will receive the following output −
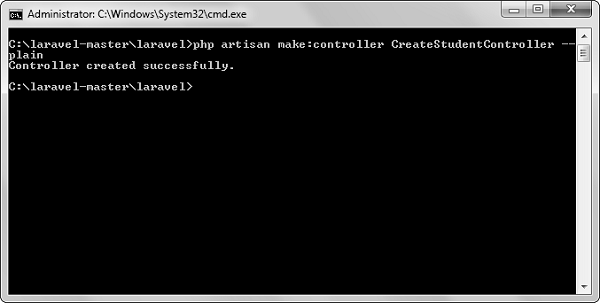
StudentController
Step 3 − Copy the following code in app/Http/Controllers/CreateStudentController.php file.
app/Http/Controllers/CreateStudentController.php
<?php
namespace App\Http\Controllers;
use Illuminate\Http\Request;
use DB;
use App\Http\Requests;
use App\Http\Controllers\Controller;
use App\Events\StudentAdded;
use Event;

class CreateStudentController extends Controller {
   public function insertform(){
      return view('stud_add');
   }
   
   public function insert(Request $request){
      $name = $request->input('stud_name');
      DB::insert('insert into student (name) values(?)',[$name]);
      echo "Record inserted successfully.<br/>";
      echo '<a href = "/event">Click Here</a> to go back.';
      
      //firing an event
      Event::fire(new StudentAdded($name));
   }
}
Step 4 − Create an event called StudentAdded by executing the following command.
php artisan make:event StudentAdded
Step 5 − After successful execution, you will receive the following output −
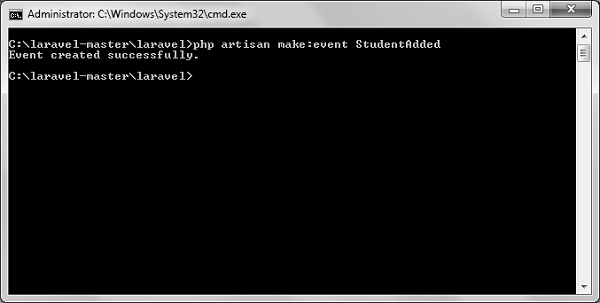
StudentAdded
Step 6 − The above command will create an event file at App\Events\StudentAdded.php. Copy the following code in that file.
App\Events\StudentAdded.php
<?php
namespace App\Events;
use App\Events\Event;
use Illuminate\Queue\SerializesModels;
use Illuminate\Contracts\Broadcasting\ShouldBroadcast;

class StudentAdded extends Event {
   use SerializesModels;
   public $name;
  
   public function __construct($name) {
      $this->name = $name;
   }
   public function broadcastOn() {
      return [];
   }
}
Step 7 − Create an event handler called HandleNewStudentAdded by executing the following command.
php artisan handler:event HandlerNewStudentAdded --event = StudentAdded
Step 8 − After successful execution, you will receive the following output −
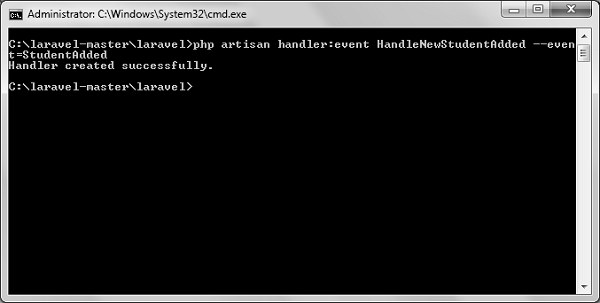
HandleNewSudent
Step 9 − The above command will create an event handler file at app\Handlers\Events\HandleNewStudentAdded.php. Copy the following code in that file.
app\Handlers\Events\HandleNewStudentAdded.php
<?php
namespace App\Handlers\Events;
use App\Events\StudentAdded;
use Illuminate\Queue\InteractsWithQueue;
use Illuminate\Contracts\Queue\ShouldQueue;

class HandleNewStudentAdded {
   protected $name;
   
   public function __construct() {
      //
   }
   public function handle(StudentAdded $event) {
      $this->name = $event->name;
      echo "<br>New Student added in database with name: ".$this->name;
   }
}
Step 10 − We now need to add the event class and its handler class in a file stored at app\Providers\EventServiceProvider.php. Notice the line in bold font and add that line in the file.
app\Providers\EventServiceProvider.php
<?php
namespace App\Providers;
use Illuminate\Contracts\Events\Dispatcher as DispatcherContract;
use Illuminate\Foundation\Support\Providers\EventServiceProvider as ServiceProvider;

class EventServiceProvider extends ServiceProvider {
   /**
   * The event listener mappings for the application.
   *
   * @var array
   */
   protected $listen = [
      'App\Events\SomeEvent' => [
         'App\Listeners\EventListener',
      ],
   
      'App\Events\StudentAdded' => [
         'App\Handlers\Events\HandleNewStudentAdded',
      ],
   ];
   /**
   * Register any other events for your application.
   *
   * @param \Illuminate\Contracts\Events\Dispatcher $events
   * @return void
   */
   public function boot(DispatcherContract $events) {
      parent::boot($events);
      //
   }
}
Step 11 − Add the following lines in app/Http/routes.php.
app/Http/routes.php
Route::get('event','CreateStudentController@insertform');
Route::post('addstudent','CreateStudentController@insert');
Step 12 − Visit the following URL to test the event.
http://localhost:8000/event
Step 13 − After visiting the above URL, you will receive the following output −
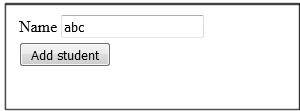
Name Abc
Step 14 − Add the name of student and click the “Add student” button which will redirect you to the below screen. Look at the line highlighted in gray color. We have added this line in our handle method of HandleNewStudentAdded class which indicates that statements are executed in handle method when an event is fired.
Record Inserted

Laravel - Error Handling

In Laravel all the exceptions are handled by app\Exceptions\Handler class. This class contains two methods — report and render.

report() method

report() method is used to report or log exception. It is also used to send log exceptions to external services like Sentry, Bugsnag etc.

render() method

render() method is used to render an exception into an HTTP response which will be sent back to browser.
Beside these two methods, the app\Exceptions\Handler class contains an important property called “$dontReport”. This property takes an array of exception types that will not be logged.

HTTP Exceptions

Some exceptions describe HTTP error codes like 404, 500 etc. To generate such response anywhere in an application, you can use abort() method as follows.
abort(404)

Custom Error pages

Laravel makes it very easy for us to use the custom error pages for each separate error codes. For example, if you want to design custom page for error code 404, you can create a view at resources/views/errors/404.blade.php. Same way, if you want to design error page for error code 500, it should be stored at resources/views/errors/500.blade.php.

Example

Step 1 − Add the following lines in app/Http/routes.php.
app/Http/routes.php
Route::get('/error',function(){
   abort(404);
});
Step 2 − Create a view file called resources/views/errors/404.blade.phpand copy the following code in that file.
resources/views/errors/404.blade.php
<!DOCTYPE html>
<html>
    
   <head>
      <title>404</title>
      <link href = "https://fonts.googleapis.com/css?family=Lato:100" rel = "stylesheet" 
         type = "text/css">
   
      <style>
         html, body {
            height: 100%;
         }
         body {
            margin: 0;
            padding: 0;
            width: 100%;
            color: #B0BEC5;
            display: table;
            font-weight: 100;
            font-family: 'Lato';
         }
         .container {
            text-align: center;
            display: table-cell;
            vertical-align: middle;
         }
         .content {
            text-align: center;
            display: inline-block;
         }
         .title {
            font-size: 72px;
            margin-bottom: 40px;
         }
      </style>
  
   </head>
   <body>
 
      <div class = "container">
         <div class = "content">
            <div class = "title">404 Error</div>
         </div>
      </div>
  
   </body>
</html>
Step 3 − Visit the following URL to test the event.
http://localhost:8000/error
Step 4 − After visiting the URL, you will receive the following output −
404Error